I recently taught a webinar for Craft U on Machine Quilt Binding. I received a few questions about how I end my bindings by “making a pocket”. So let me show ten steps to make the pocket for your binding.

Step 1. Open the binding and lay it on the edge of the quilt sandwich.
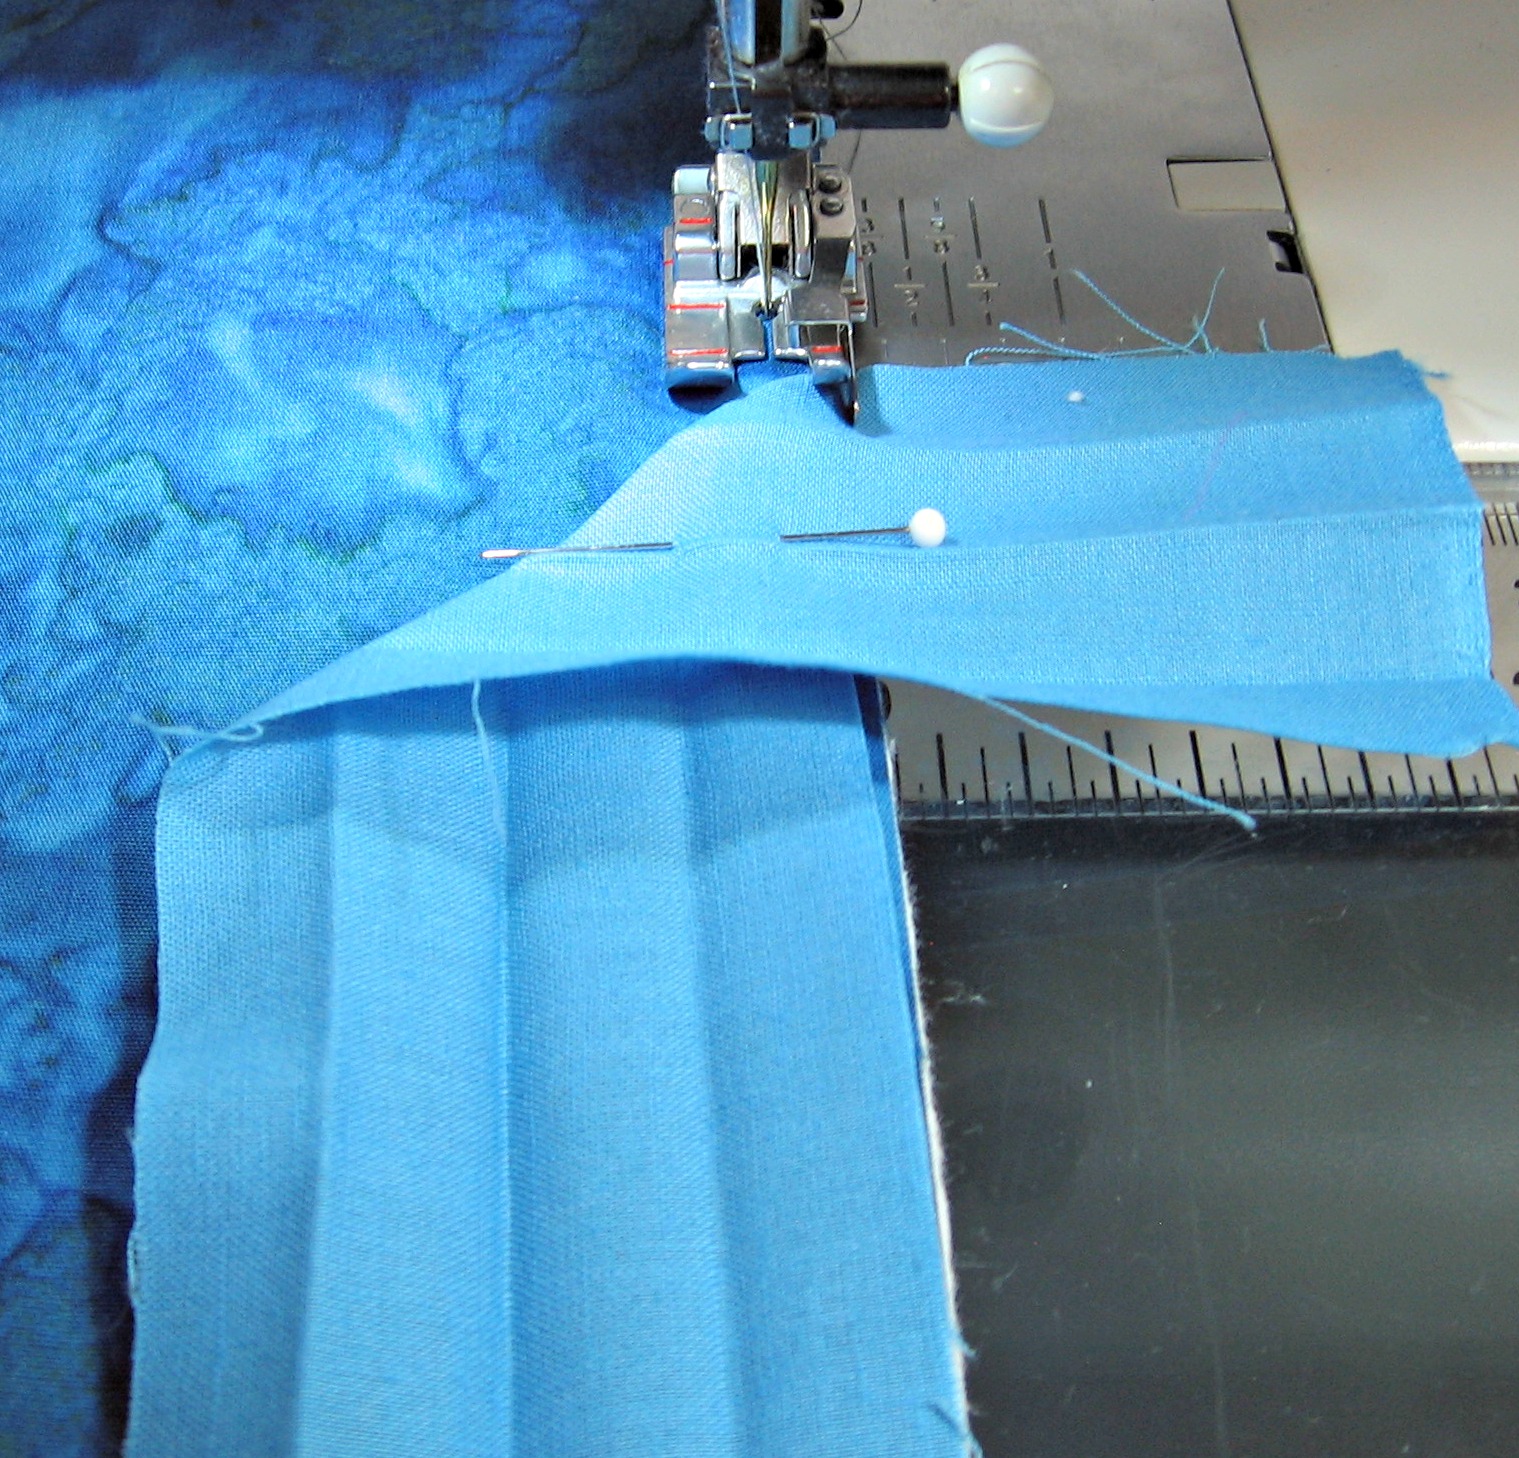
Step 2. Fold the top inch or two down at a 45 degree angle.
Step 3. Sew down for about 8 inches. Leave a thread tail, if possible.
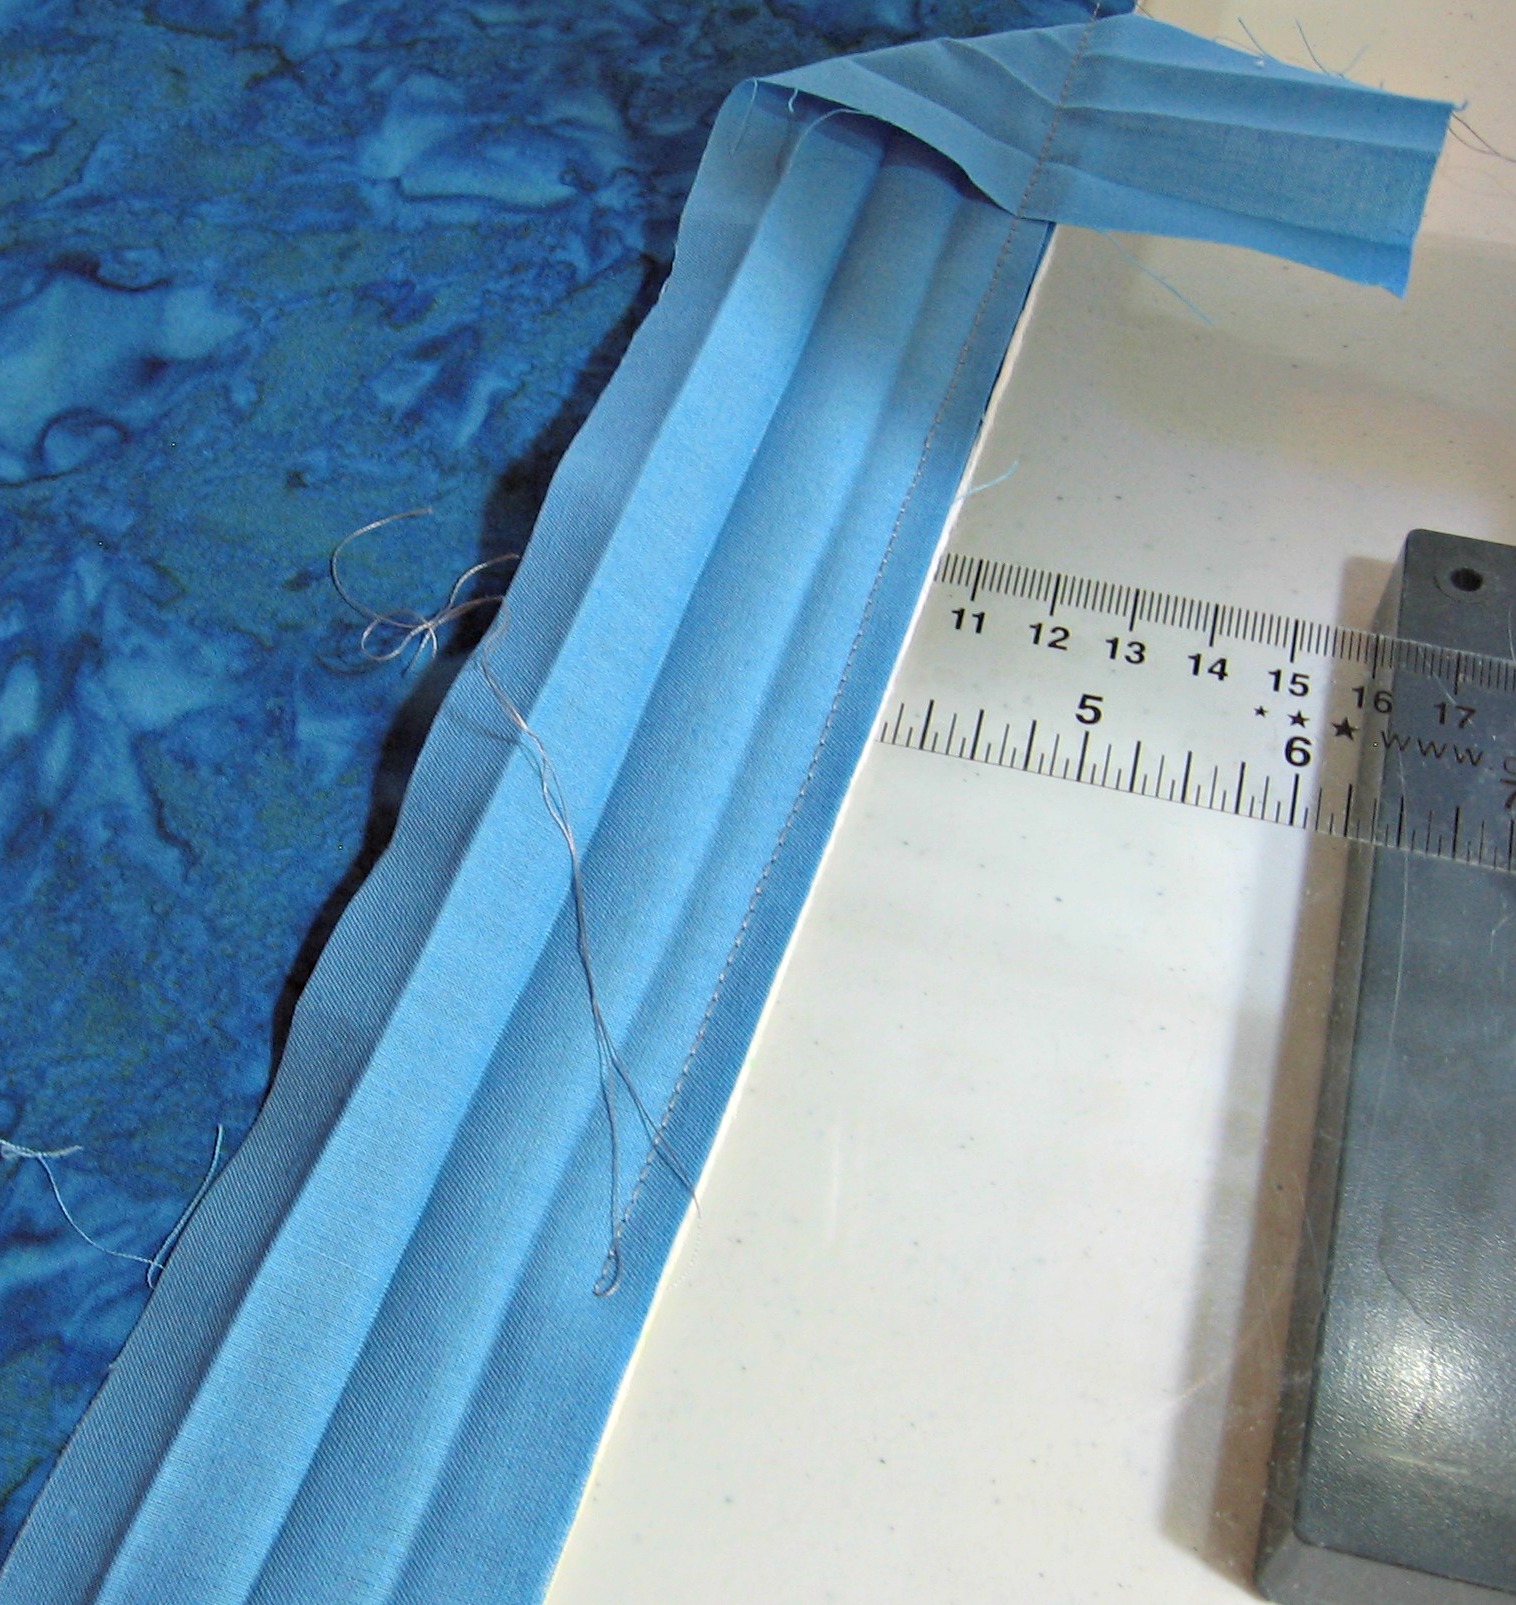
Step 4. Fold the binding once.
Step 5. Start sewing about an inch above where you stopped before. The thread tails offer a good visual indicator.
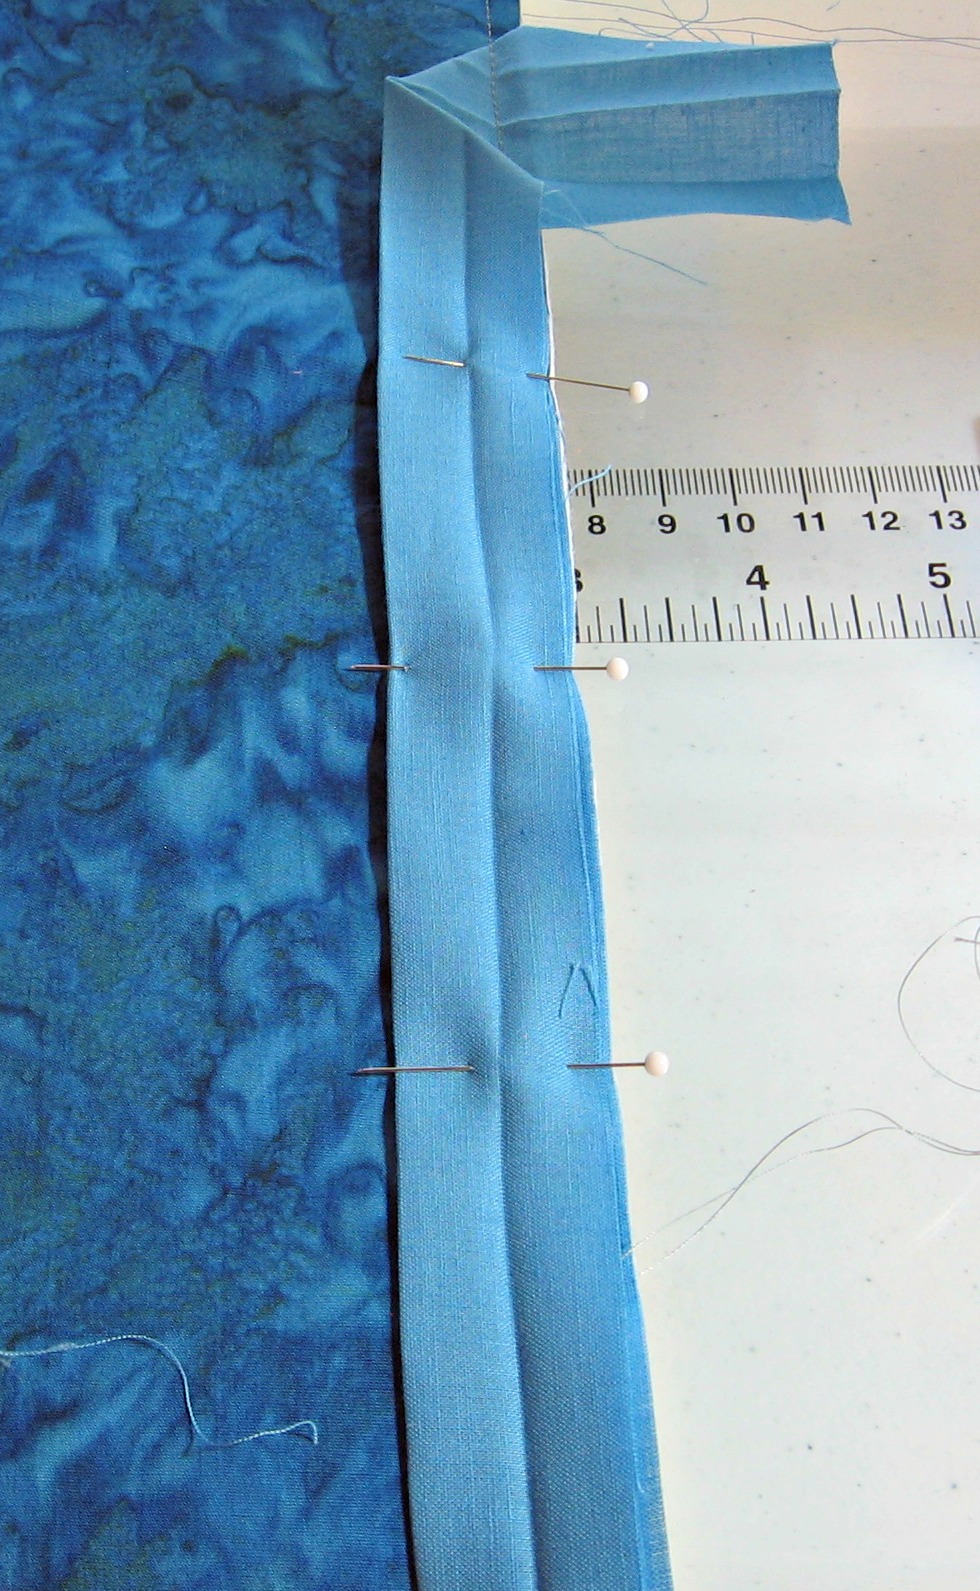
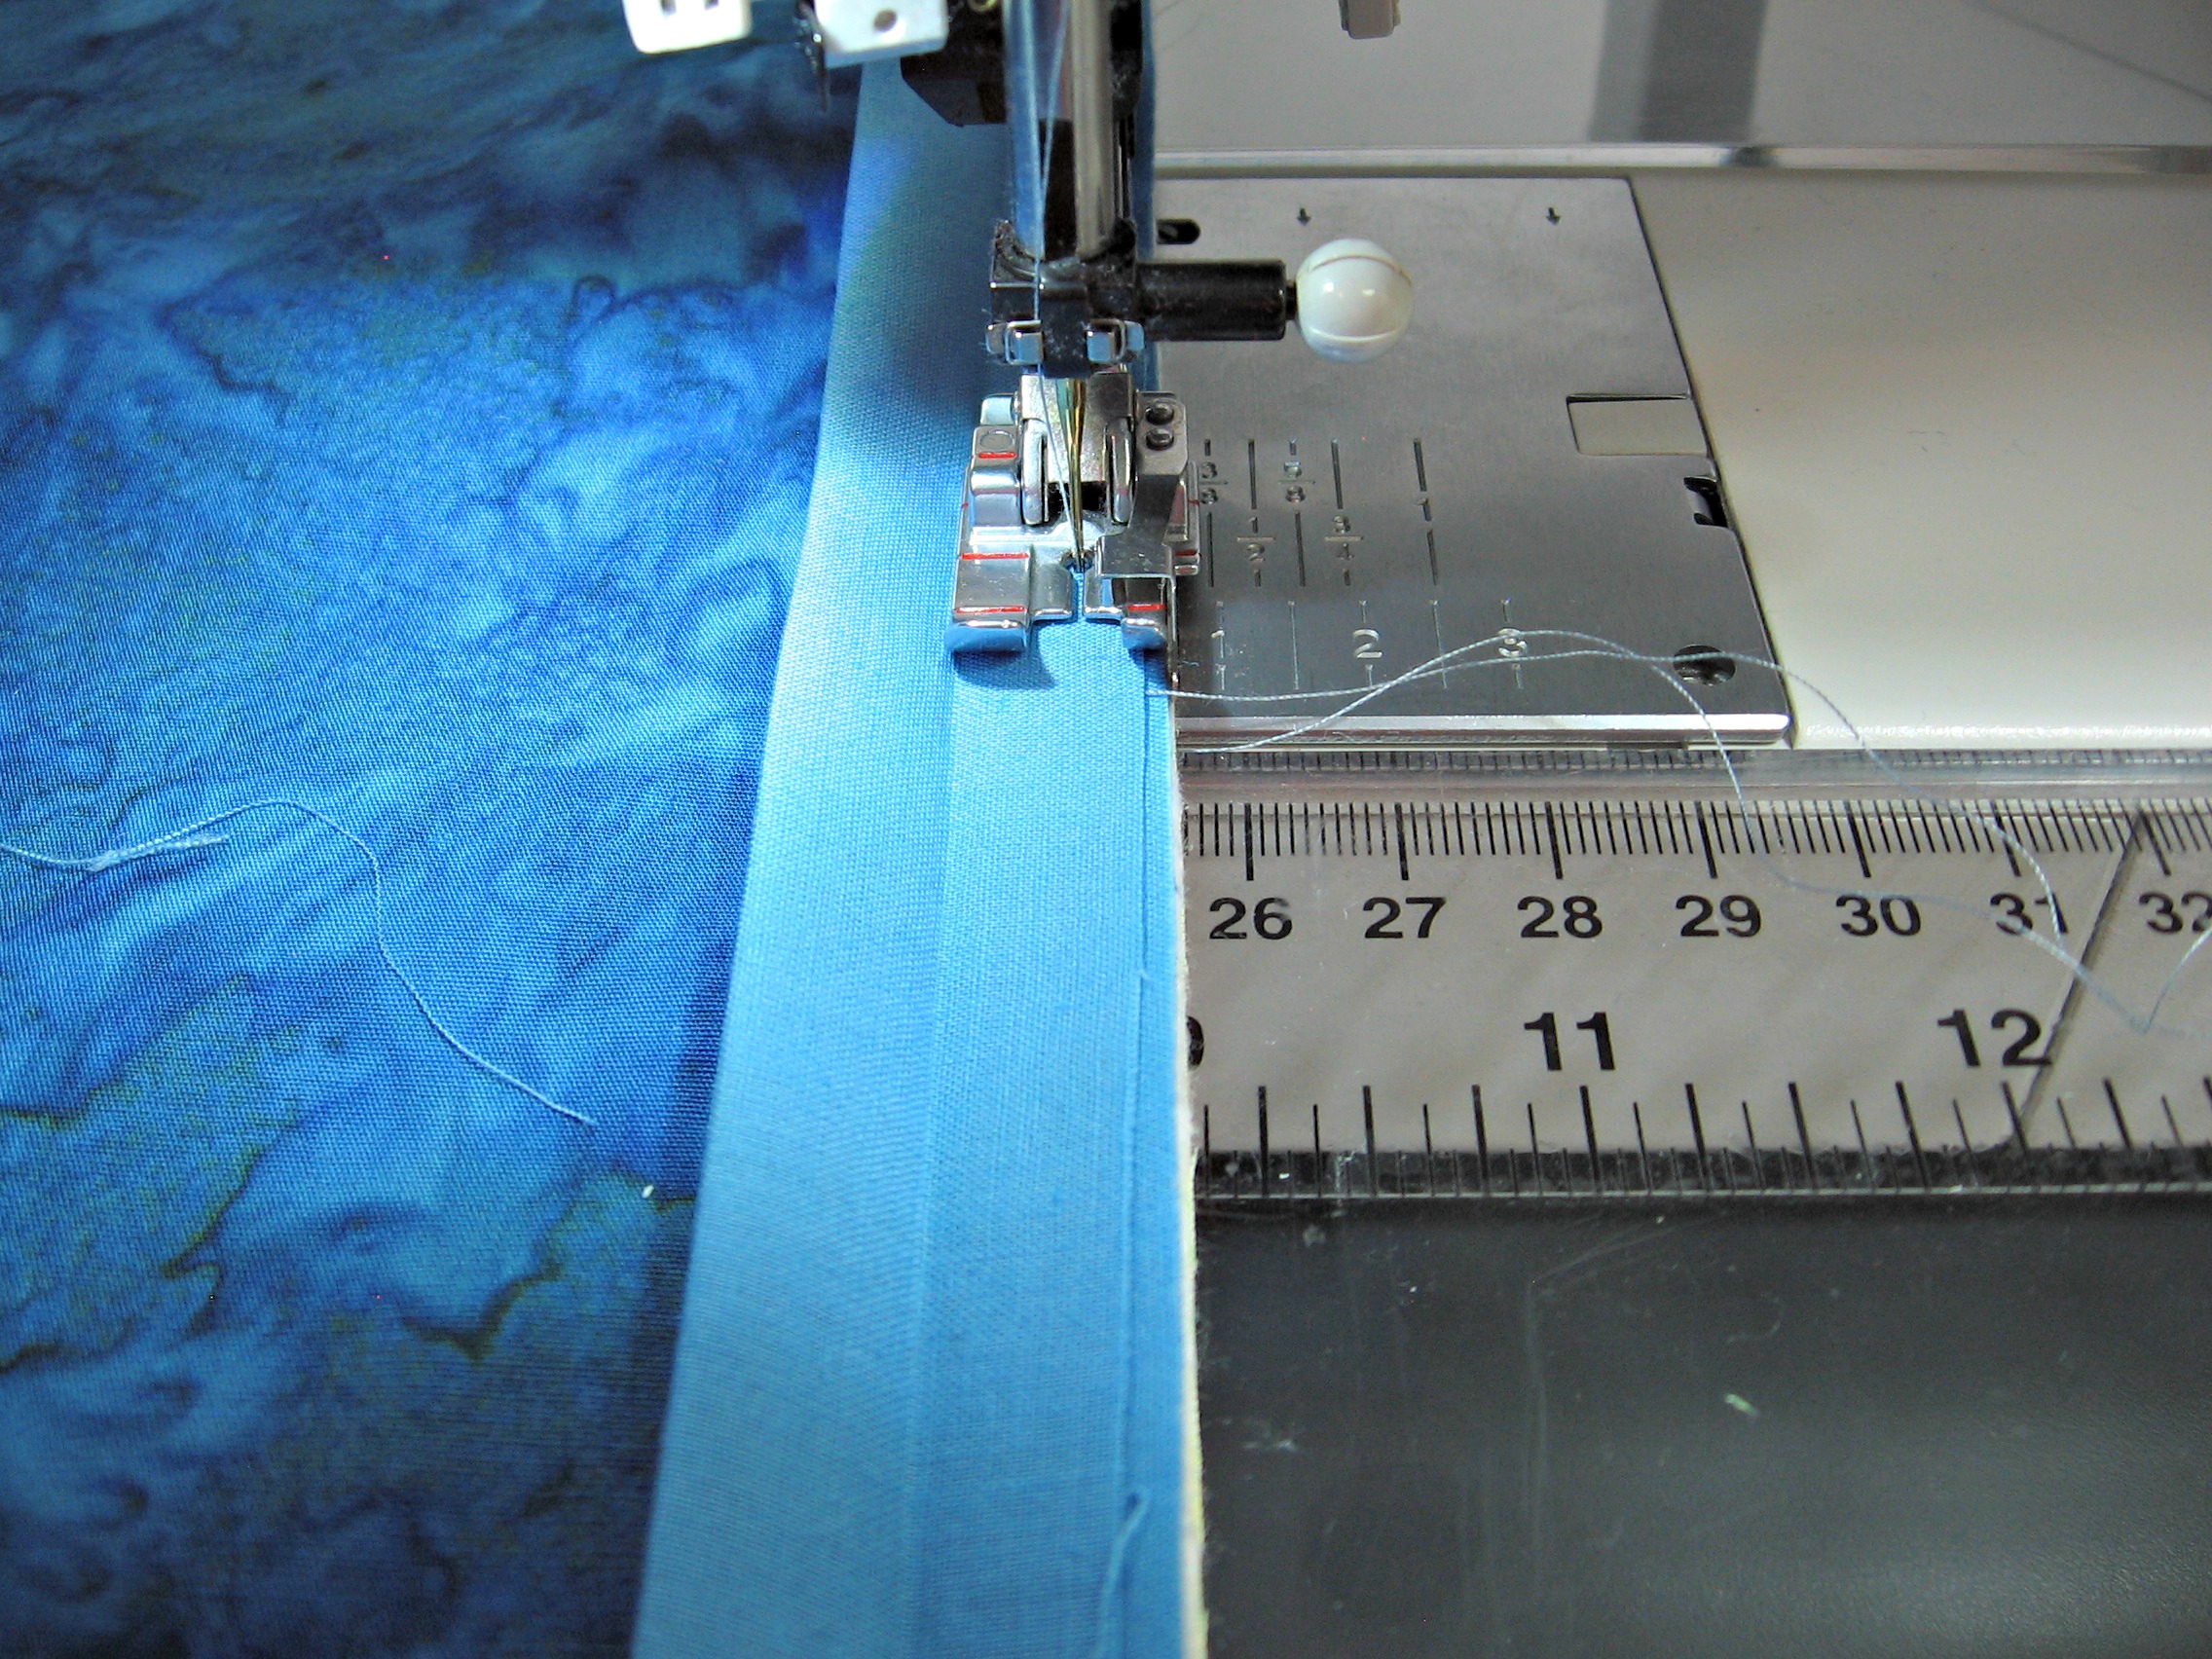
Step 6. Sew around all four sides until you are about four inches from where you started.
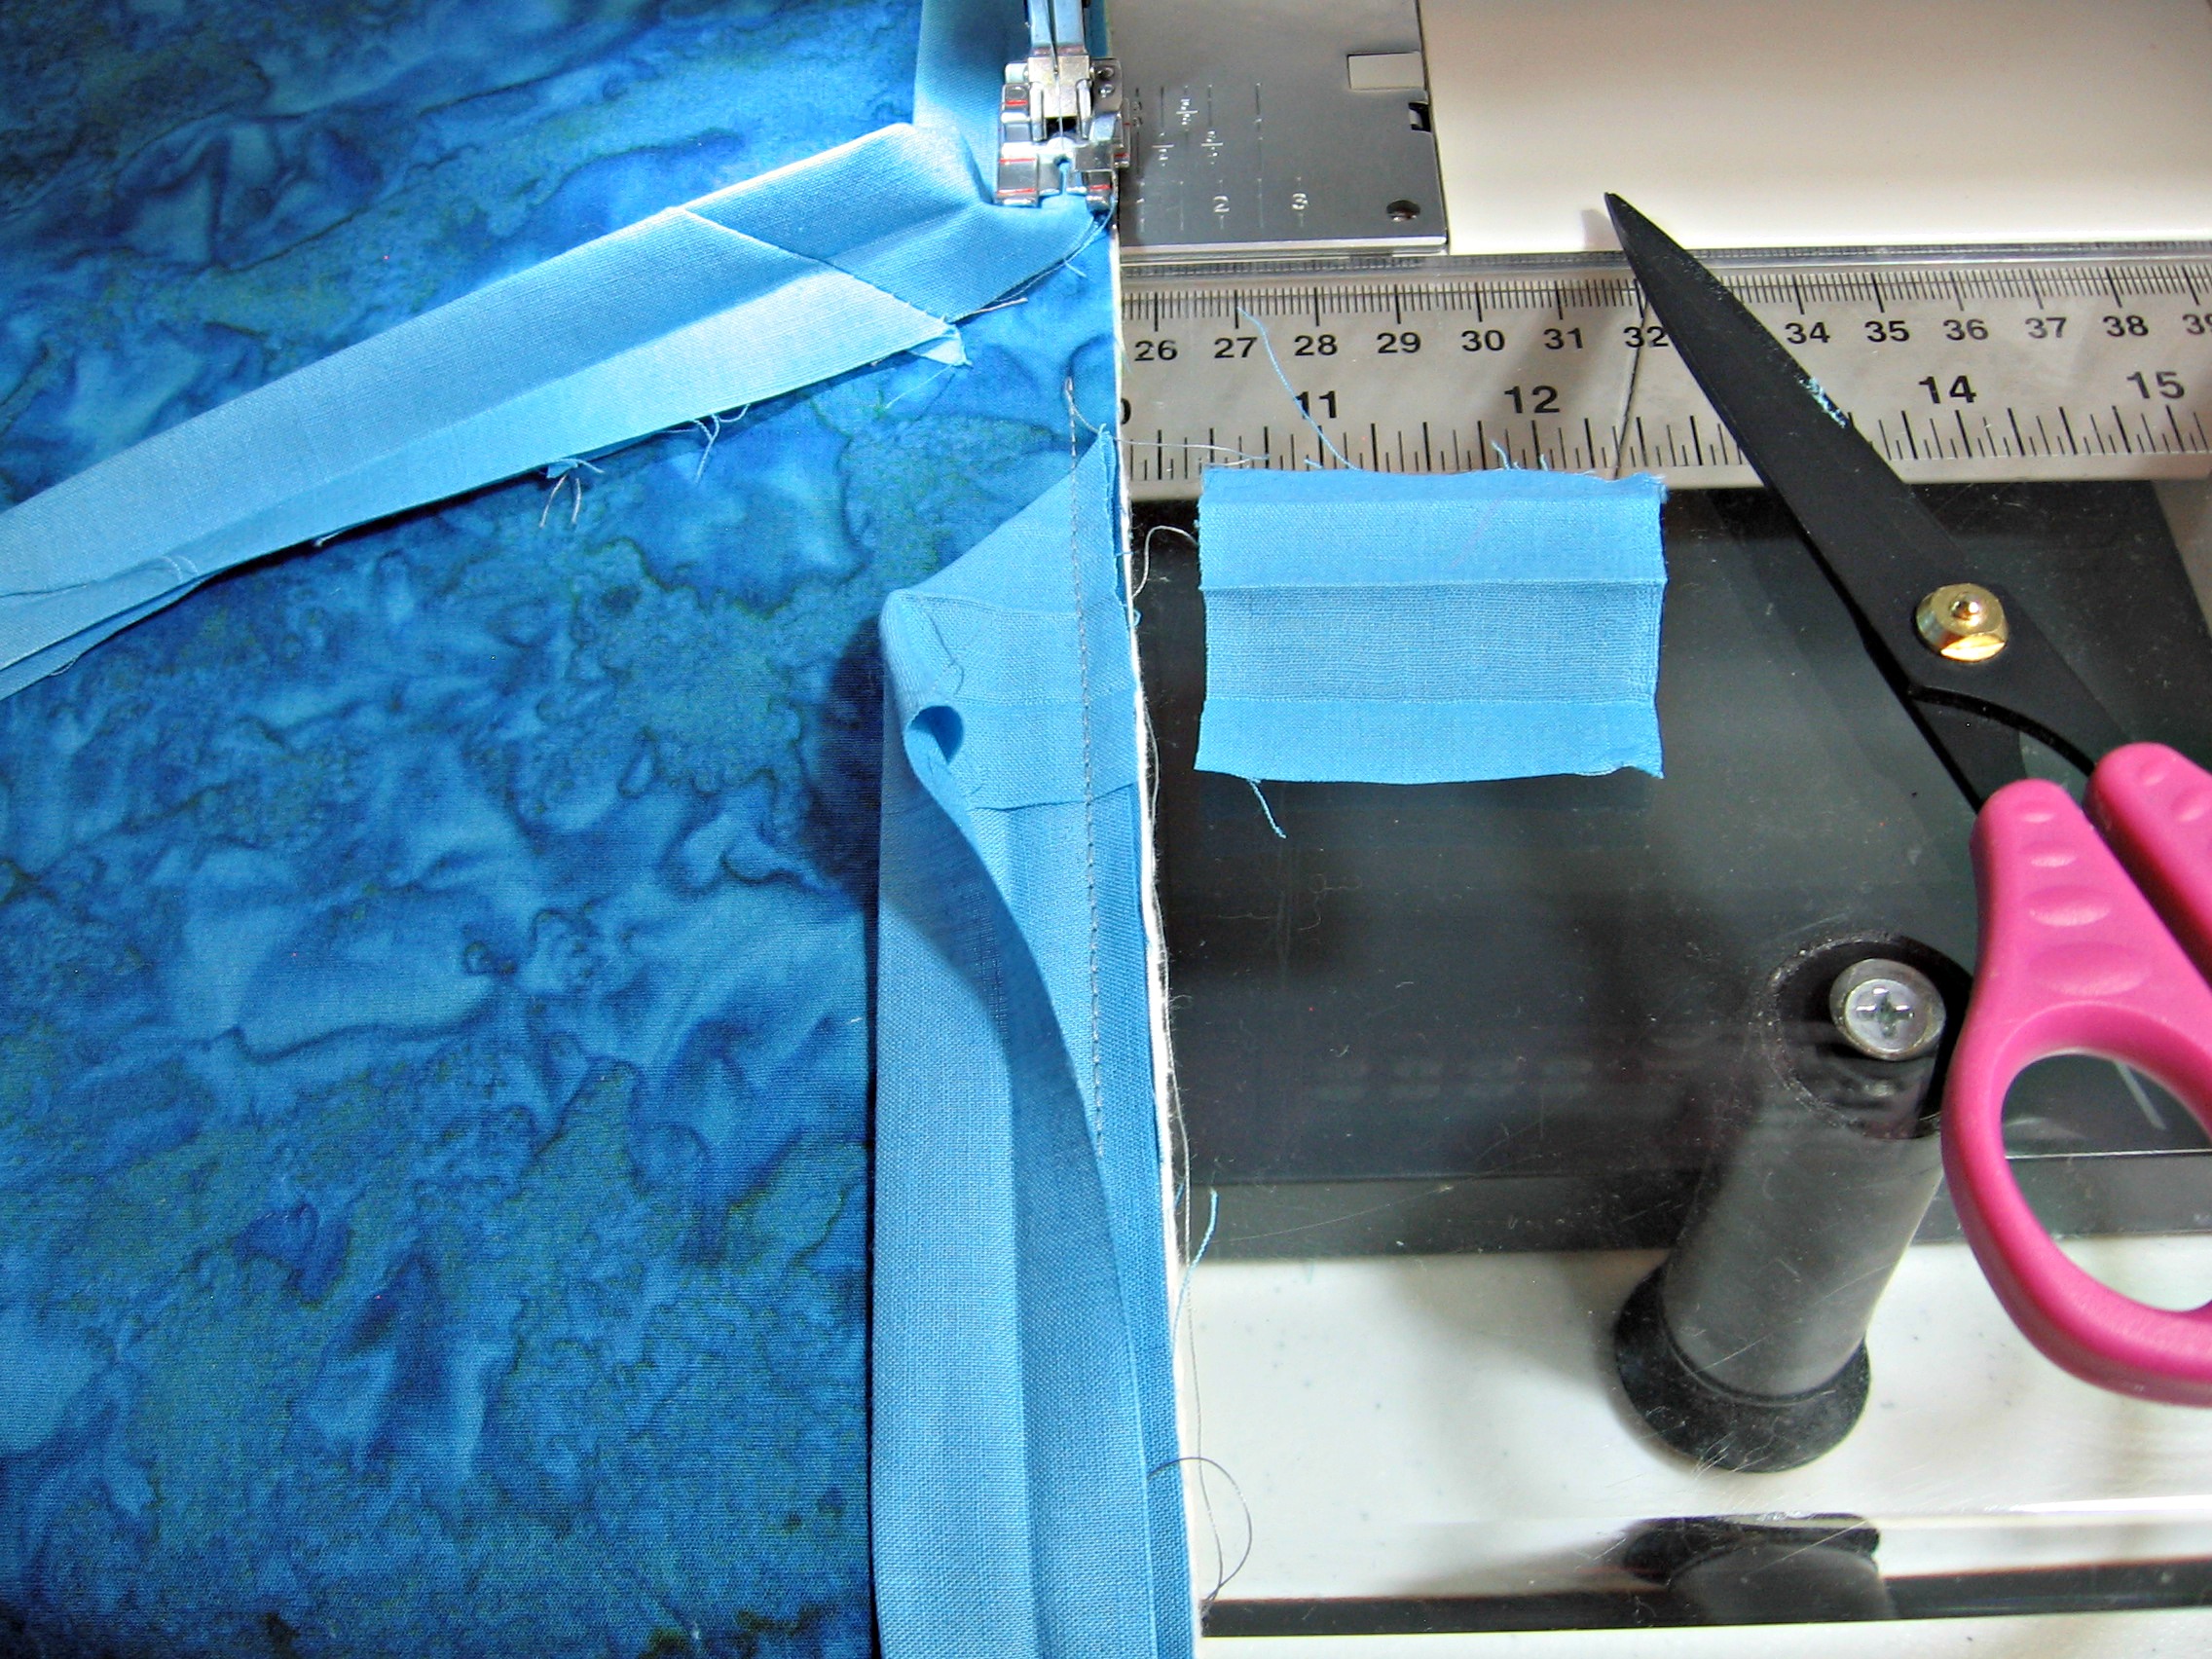
Step 7. Clip off the end that is hanging off the edge of the quilt.
Step 8. Trim the binding, at a 45 degree angle, so it ends half way between the top fold and where you started stitching again.
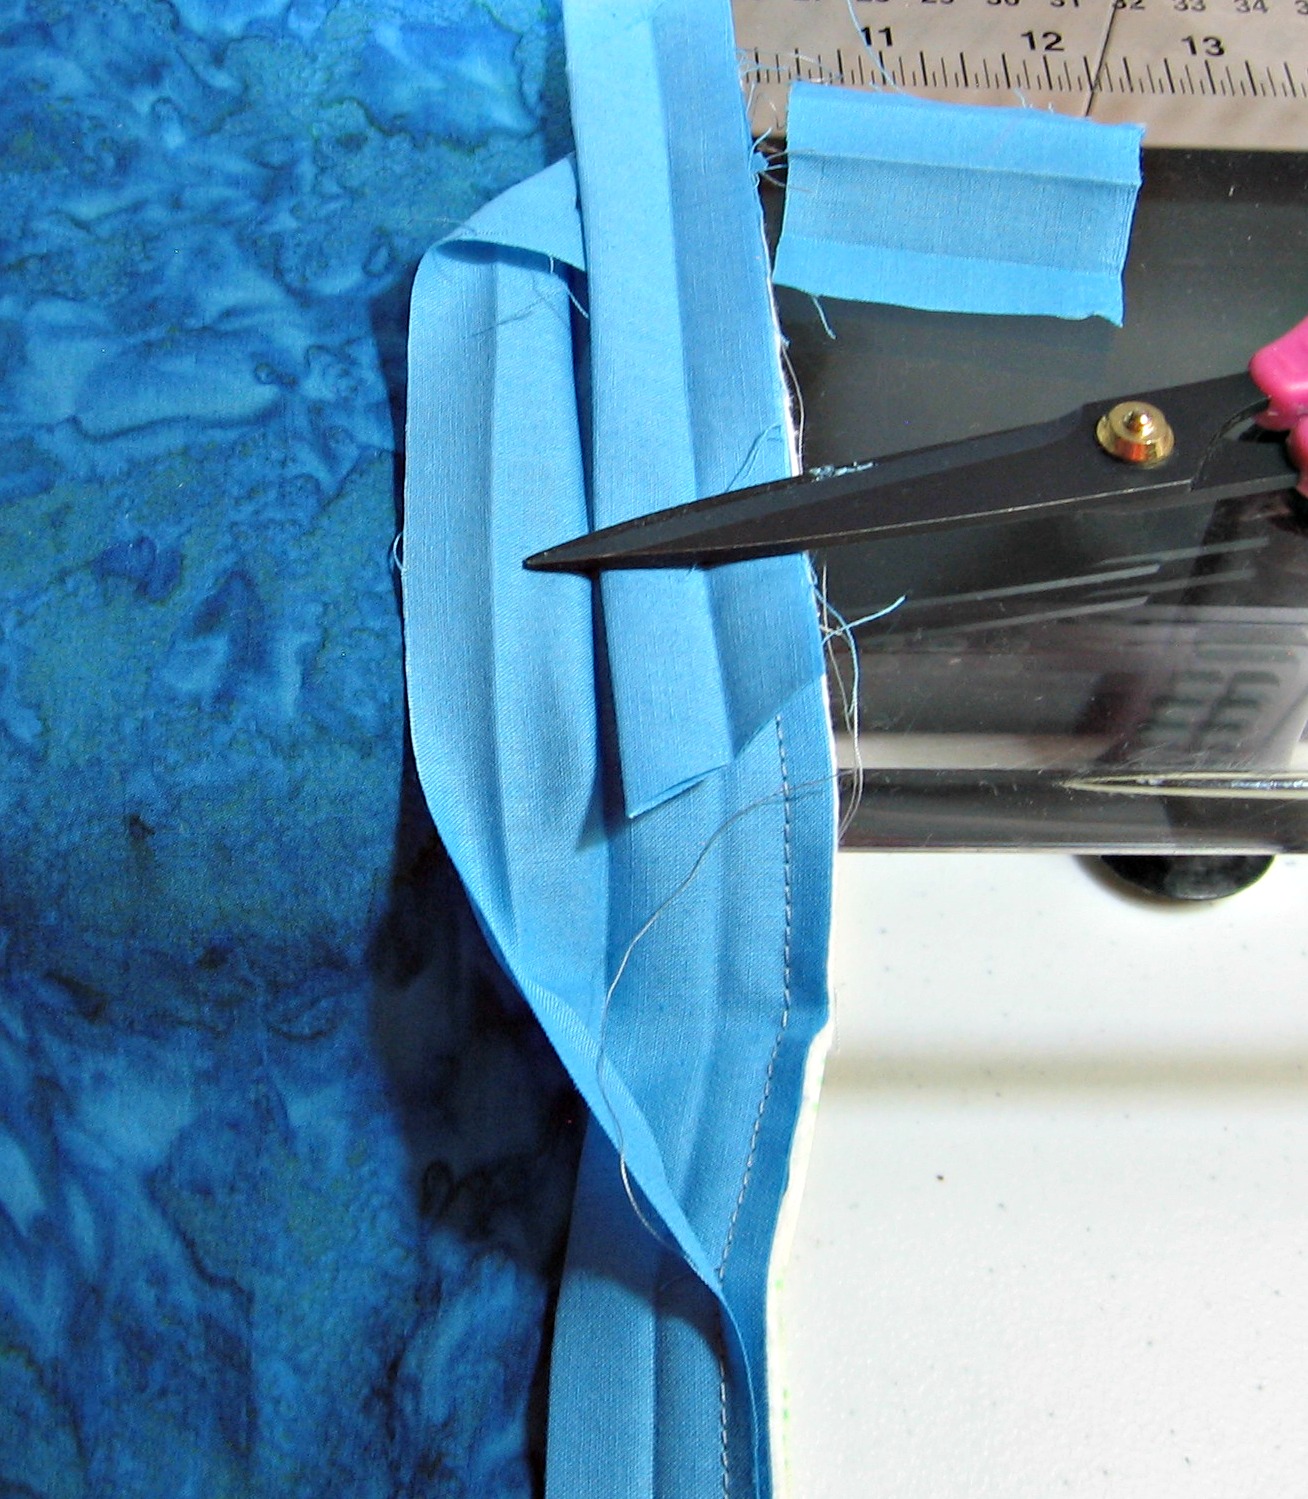
Step 9. Tuck the binding inside and fold close.
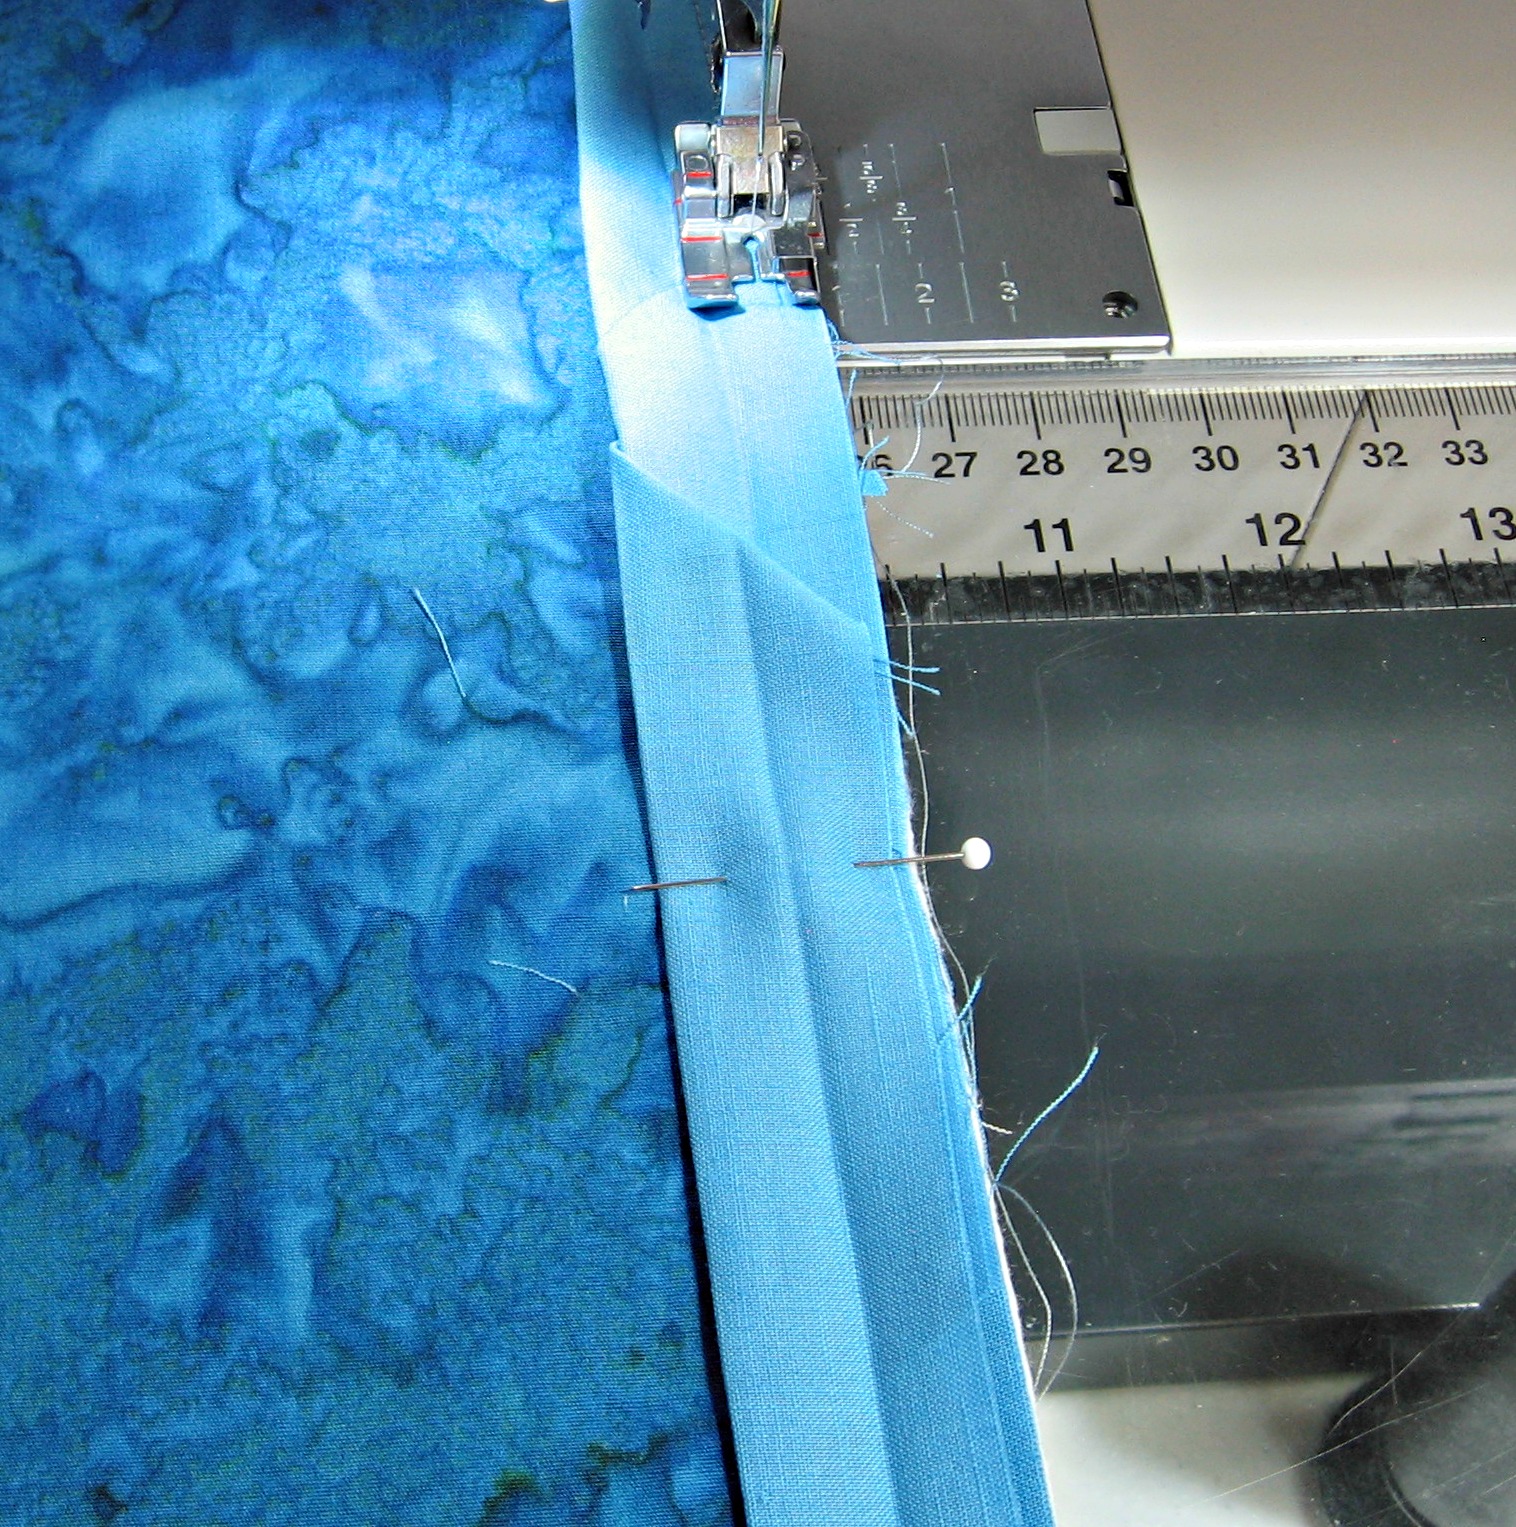
Step 10. Stitch down just past the thread tails and knot the end.
Regardless of how I bind my quilts, I have found that making a pocket is neat, fairly intuitive and requires no additional tools!
Test this technique using a simple project, like a potholder, orphan patch or FMQ practice pieces.
Good luck!
Jenny
P.S. I love to see pictures of finished stuff.
Wow! I’m going to try this on my very next project! This looks much simpler and easier than the way I’ve been doing it. I always have to stop and think how I did it last, and then get that binding tool out, remember how to use the darn thing. lol, This is going to be my next attempt at binding my next quilt. Thank you so much. I really enjoy your tutorials that I’ve seen so far, I’ve only just found your site today, and watched several so far. We are gearing up for school to start here in a few days, so my quilting time will be a little limited, but I will be working on projects. Thank you again, and looking forward to more tutorials. Have a great day!
My thoughts exactly! Try it! I would love to see your results.